Category: Uncategorized

  • Types of Foundation Cracks Explained

    Types of Foundation Cracks Explained

    Home › Types of Foundation Cracks Explained

    There are several types of foundation cracks worth knowing before you decide whether to worry: vertical cracks, which are often minor shrinkage or settling; horizontal cracks, which are more concerning because they can signal pressure pushing a wall inward; stair-step cracks along mortar joints in block or brick; and diagonal cracks, which vary in severity depending on width and cause.

    Vertical Cracks

    Vertical cracks running roughly straight up and down are the most common type and are often the result of normal concrete shrinkage as it cured, sometimes decades ago. They’re usually not a structural concern on their own, though a vertical crack that’s actively leaking still needs to be sealed, and one that’s noticeably wider at the top or bottom than the rest of its length is worth a closer look.

    Horizontal Cracks

    Horizontal cracks running across a wall are generally more concerning than vertical ones because they often indicate hydrostatic pressure pushing the wall inward from outside, especially in block foundations. A horizontal crack, particularly one paired with visible bowing, usually calls for a structural assessment rather than a simple injection, since the wall itself may need reinforcement.

    Stair-Step Cracks in Block and Brick

    Stair-step cracks follow the mortar joints in a diagonal, step-like pattern and are common in block or brick foundations experiencing settling or pressure. A stair-step crack can range from a minor, stable settling crack to a sign of more significant movement, and the difference usually comes down to whether it’s actively growing or has been stable for years.

    Diagonal Cracks and When to Worry

    Diagonal cracks, running at an angle rather than straight up-down or side-to-side, can result from uneven settling and vary widely in severity. As a general rule, a crack that’s hairline, stable, and not leaking is lower concern; a crack that’s wider than about a quarter inch, growing, or accompanied by other signs like sticking doors or sloping floors deserves a professional look rather than a guess.

    How Crack Width Is Typically Measured

    Crack width matters more than most other single factors, and it’s usually measured in fractions of an inch using a simple crack gauge or even a coin for a rough estimate — a dime is about a sixteenth of an inch thick, for reference. Cracks under about an eighth of an inch are generally lower concern if stable and not leaking; cracks approaching or exceeding a quarter inch, especially if growing, warrant a closer professional look regardless of direction or pattern.

    Monitoring a Crack Over Time

    For a crack you’re not ready to have repaired immediately, a simple way to monitor it is marking the ends with a pencil line and the date, then checking back in a few months to see if it’s grown past the marks. This isn’t a substitute for a professional assessment, but it gives you real information about whether you’re dealing with a stable, old crack or one that’s actively changing, which is useful context regardless of which type it turns out to be.

    Cracks Near Corners: A Special Case

    Cracks that form near the corners of a foundation, running diagonally from a window or door opening, deserve particular attention because corners concentrate structural stress differently than the middle of a wall. A crack radiating from the corner of a basement window, for example, can indicate settling specific to that section of foundation rather than a broader issue across the whole wall. These cracks are common enough that they don’t automatically signal a serious problem, but their location makes them worth mentioning specifically to whoever assesses your foundation, since the repair approach can differ somewhat from a crack running through the flat, unbroken section of a wall.

    When Multiple Types of Foundation Cracks Appear Together

    It’s not unusual to find more than one type of crack in the same basement — a stable vertical shrinkage crack in one spot and a more concerning stair-step or horizontal crack elsewhere. When this happens, it’s important not to let a familiarity with one type of crack (“oh, that’s just shrinkage, it’s fine”) lead to overlooking a different, more significant crack nearby. Each crack in a basement deserves its own assessment rather than being lumped in with whatever conclusion applied to a different crack in the same room.

    Why Photographing Cracks Over Time Is Worth the Effort

    Taking a simple photo of any crack you’re monitoring, with something for scale like a tape measure or coin in frame, and repeating that photo every few months, builds a visual record that’s far more reliable than memory alone. This is especially useful if you’re not ready to schedule a repair immediately but want to track whether a crack is stable. If you do eventually have it assessed, Drew Dryer will also find that history useful context, since it shows real change over time rather than a single snapshot.

    Getting a Written Read on Your Specific Crack

    General guidance about crack types can only take you so far — every foundation and every crack has its own specific history and context. If you’d like a written, specific read on a crack in your own basement rather than relying on general categories, Drew Dryer can assess it directly and tell you plainly which category it falls into and what, if anything, it needs. Call (260) 305-1147 or reach out to schedule a look.

    Get Help With Your Basement

    If you’ve found a crack and aren’t sure which category it falls into, Drew Dryer can look at it in person and tell you honestly what it means. Call (260) 305-1147 or reach out here.

    More guides

    About the author

    Drew Dryer, Owner

    Drew Dryer owns and runs Dryer Basement Waterproofing Fort Wayne. He has 10 years of experience waterproofing basements in the Fort Wayne area, and started the business to work directly with homeowners rather than through a sales layer.

    More about Drew Dryer

    Last updated: September 30, 2026

  • DIY vs. Professional Basement Waterproofing

    DIY vs. Professional Basement Waterproofing

    Home › DIY vs. Professional Basement Waterproofing

    DIY basement waterproofing can genuinely handle small, surface-level fixes — extending a downspout, regrading a small area, or applying a masonry sealer for light dampness. It generally falls short for anything involving real hydrostatic pressure, a structural crack, or a system that needs to move water correctly, like drain tile and a sump pump.

    What DIY Can Reasonably Handle

    Extending downspouts a few feet farther from the foundation, adding splash blocks, and regrading a small low spot near the house are all within reach for a reasonably handy homeowner, and they can genuinely solve a surface-water problem on their own. Applying a masonry sealer to an interior wall for light dampness is also a fair DIY project, as long as you understand it only helps with minor moisture, not active water pressure.

    Where DIY Usually Falls Short

    Crack injection requires the right product and technique to fill a crack through its full depth, not just the surface — a surface patch often looks fine for a while and then fails once the crack is under real pressure again. Interior drain tile involves cutting concrete, sizing a sump pit and pump correctly, and sloping the system so water actually flows where it’s supposed to, which is hard to get right without experience. Exterior waterproofing involves excavation near a foundation, which carries real risk if done incorrectly.

    DIY Basement Waterproofing: The Real Cost of Getting It Wrong

    The risk with a DIY fix that doesn’t actually solve the underlying problem isn’t just wasted time — it’s water continuing to find its way in while you believe the issue is handled, sometimes causing more damage than if nothing had been done at all. A sealer applied over an active leak, for example, can trap moisture in the wall instead of letting it drain, which sometimes makes the problem worse rather than better.

    A Reasonable Way to Decide

    If the fix is about redirecting surface water — downspouts, grading, a small French drain — it’s a reasonable DIY project for a handy homeowner. If water is coming through a crack, the cove joint, or a wall under pressure, or if a sump pump and drain tile system needs to be sized and installed correctly, professional basement waterproofing is worth the cost, because getting it wrong once often costs more than doing it right the first time.

    Common Questions

    Can I waterproof my basement walls from the inside?

    For light dampness, a DIY masonry sealer can help, but real water pressure or an active leak generally needs a proper interior drain tile system, which involves work most homeowners aren’t equipped to do themselves.

    Tools and Materials: What DIY Actually Requires

    A downspout extension project needs little more than extensions or splash blocks from a hardware store and a shovel for minor regrading. A masonry sealer project needs the right product for your specific wall material and proper surface prep, which matters more than people expect — sealer applied over a dirty or damp wall often fails prematurely. Crack injection and drain tile installation require specialized products, tools, and technique that go well beyond typical homeowner equipment, which is the practical line between reasonable DIY and professional work.

    Time and Effort Considerations

    Even projects within DIY reach take real time and physical effort — regrading soil by hand around a foundation is more labor-intensive than it looks, and getting the slope right takes some trial and error. Weigh the time you’d spend against what a professional would charge for the same result, especially for anything involving concrete work, where professional equipment makes the job faster and more reliably correct than a first attempt with rented tools.

    A Realistic Look at DIY Crack Injection Kits

    Hardware and home improvement stores do sell DIY crack injection kits, and for a very minor, stable, hairline crack with light seepage, a careful, well-prepared DIY application can sometimes provide some improvement. The challenge is that these kits generally use lower-pressure application methods than professional equipment, which means they’re less reliable at filling a crack through its complete depth, especially for anything wider than hairline or a crack under real hydrostatic pressure. A crack that looks sealed on the surface but isn’t filled all the way through can still leak, sometimes in a way that’s harder to diagnose the second time because the surface now looks repaired. If a DIY attempt doesn’t fully solve the problem, that’s useful information — it usually means the crack needs professional-grade injection rather than a second attempt with the same kind of product.

    Getting a Professional Opinion Even If You Plan to DIY

    One approach that works well for a lot of homeowners is getting a professional assessment first, even if you ultimately plan to handle some of the work yourself — understanding the actual cause and scope of your basement’s water problem helps you make a more informed decision about what’s realistically within DIY reach and what isn’t. Drew Dryer is happy to give you that honest read, whether or not you end up hiring us for the work itself.

    A Final Gut-Check Before Deciding

    If you’re still torn between DIY and calling a professional, ask yourself honestly: if this fix doesn’t work, how much worse does the problem get, and how much harder does it become to fix afterward? For grading and downspouts, a failed DIY attempt costs little beyond your time. For anything touching the foundation itself, a failed attempt can mean more water damage and a more complicated repair later. That asymmetry is worth weighing seriously, and Drew Dryer is glad to talk through where your specific project falls on that spectrum.

    Get Help With Your Basement

    Not sure whether your situation is a DIY fix or needs a professional? Drew Dryer will give you an honest read either way. Call (260) 305-1147 or reach out here.

    More guides

    About the author

    Drew Dryer, Owner

    Drew Dryer owns and runs Dryer Basement Waterproofing Fort Wayne. He has 10 years of experience waterproofing basements in the Fort Wayne area, and started the business to work directly with homeowners rather than through a sales layer.

    More about Drew Dryer

    Last updated: September 30, 2026

  • Signs You Need Basement Waterproofing

    Signs You Need Basement Waterproofing

    Home › Signs You Need Basement Waterproofing

    The clearest signs you need basement waterproofing are recurring water on the floor, damp or bowing walls, a musty smell that won’t go away, and a sump pump that runs constantly during wet weather. A single wet spot after an unusually heavy storm is different from a pattern that repeats every time it rains.

    Visible Water and Staining

    Standing water, a wet spot that shows up in the same place after every heavy rain, or water actively tracking down a wall are the most obvious signs. Staining on the floor or lower wall, even after the area has dried, often marks where water has been repeatedly, and it’s worth paying attention to whether the spot is growing over time rather than staying the same size.

    Efflorescence, Musty Smells, and Mold

    Efflorescence — the white, chalky mineral deposit left behind as water evaporates from block or brick — is a sign water has been moving through the wall even if you’ve never seen it wet. A musty smell that persists no matter how much you clean, or visible mold or mildew on stored items, framing, or drywall, both point toward ongoing moisture rather than a one-time event.

    Structural and Mechanical Warning Signs

    Cracks that widen over time, a wall that looks like it’s bowing or leaning inward, and doors or windows in the basement that start sticking can all indicate water pressure is affecting the foundation structurally, not just cosmetically. On the mechanical side, a sump pump that runs almost constantly during wet weather, or one that’s noticeably struggling, suggests the drainage system is being pushed harder than it should be.

    What to Do Once You Notice These Signs

    None of these signs alone necessarily means you need a full waterproofing system — sometimes a grading fix or a targeted crack repair is enough. The only way to know which situation applies to your basement is a real walk-through. Basement waterproofing services cover everything from a single repair to a full system, and Drew Dryer will tell you honestly which one your home needs.

    Common Questions

    Is it normal to get water in the basement after heavy rain?

    It’s common in Fort Wayne’s clay soil, but recurring water after rain usually points to a specific, fixable cause — grading, a crack, or an undersized sump pump — rather than something to just live with. Recurring water like that is one of the clearest signs you need basement waterproofing rather than a smaller fix.

    Signs That Are Easy to Miss

    Some signs are subtle enough that homeowners live with them for years without connecting the dots — a slightly higher humidity feel in the basement than the rest of the house, boxes or stored items that feel damp on the bottom even though the floor looks dry, or a faint mustiness that’s become so familiar you stop noticing it. These are worth paying attention to specifically because they’re easy to normalize, and by the time they become obvious, the underlying cause has often had years to develop.

    How Signs Tend to Progress Over Time

    Basement water problems in Fort Wayne rarely start as a dramatic flood — they usually begin small: a bit of dampness one spring, a slightly harder-working sump pump the next year, a first visible crack a couple years after that. Understanding this progression is useful because it means catching a sign early, even a minor one, is genuinely worth acting on rather than waiting for it to become undeniable. Early intervention is also almost always the more affordable path.

    How Fort Wayne's Seasons Change What Signs Look Like

    The signs above can look different depending on the season. In spring, watch for water directly connected to snowmelt and rain, along with a sump pump working harder than usual. In summer, humidity-related signs like musty smells and condensation tend to dominate, sometimes independent of any actual leak. In fall, it’s worth doing a broader check for anything that built up unnoticed over a humid summer. In winter, watch specifically for water tied to ice dams or a sudden thaw rather than ordinary rain, since winter water problems in Fort Wayne often have a different, more specific cause than the general clay-soil pressure that dominates the rest of the year. Recognizing which season-specific pattern you’re seeing can help narrow down the likely cause even before a professional assessment.

    Why Waiting Rarely Makes the Problem Smaller

    It’s tempting to wait and see if a minor sign resolves on its own, especially if it only showed up once. In our experience, water problems in Fort Wayne basements are more likely to gradually worsen than to resolve themselves, since the underlying cause — clay soil pressure, an aging crack, deteriorating drainage — doesn’t go away without some kind of intervention. That doesn’t mean every sign requires an immediate, expensive fix, but it does mean an early assessment, even just to understand what you’re dealing with, tends to be more useful than waiting for the problem to become undeniable.

    Getting a Second Opinion When Signs Are Ambiguous

    Sometimes the signs are genuinely unclear even to an attentive homeowner — a smell that comes and goes, a crack that might be new or might have always been there, a sump pump that seems to run a bit more than you remember but you’re not entirely sure. In these ambiguous cases, a second opinion or a baseline assessment is useful even if nothing urgent turns out to be wrong, since it gives you a documented starting point to compare against if things change later. There’s no downside to understanding your basement’s actual condition, even when the signs aren’t dramatic enough to feel urgent on their own.

    Get Help With Your Basement

    If you’re noticing any of these signs, Drew Dryer can look at your basement and tell you plainly what it needs. Call (260) 305-1147 or reach out here to schedule a walk-through. He’ll tell you honestly whether they’re genuine signs you need basement waterproofing or something more minor.

    More guides

    About the author

    Drew Dryer, Owner

    Drew Dryer owns and runs Dryer Basement Waterproofing Fort Wayne. He has 10 years of experience waterproofing basements in the Fort Wayne area, and started the business to work directly with homeowners rather than through a sales layer.

    More about Drew Dryer

    Last updated: September 30, 2026

  • What to Do When Your Basement Floods

    What to Do When Your Basement Floods

    Home › What to Do When Your Basement Floods

    What should you do when your basement floods? Prioritize safety first — avoid standing water near electrical outlets or panels — then remove water and dry the space as quickly as reasonably possible, since standing water raises the risk of mold within about 24 to 48 hours. Once the immediate situation is handled, find out what actually caused the flood so it doesn’t happen again.

    What to Do When Your Basement Floods: Safety First

    Before doing anything else, avoid walking through standing water if there’s any chance it’s in contact with electrical outlets, cords, or a panel, and if you’re unsure, shut off power to the affected area at the breaker if you can do so safely from a dry location. If the water is extensive or you’re not comfortable assessing the electrical risk yourself, wait for help rather than wading in.

    Get the Water Out

    Once it’s safe, start removing standing water as quickly as you can — a wet vac works for smaller amounts, while a significant flood usually calls for a pump or professional water extraction. Move furniture, boxes, and anything else out of the water and into a dry area, and open windows or run fans if the weather allows, to start drying the space. The faster water is out and air is moving, the lower the risk of mold taking hold in drywall, framing, or belongings.

    Document and Assess the Damage

    Take photos of the affected area and any damaged belongings before you start cleanup, in case you need them for an insurance claim, though keep in mind most standard homeowners policies don’t cover gradual seepage the way they cover a sudden event. Check baseboards, drywall, and flooring over the next day or two for signs they’re staying damp longer than expected, which can indicate moisture trapped behind a surface that looks dry.

    Find Out Why It Happened

    Once the immediate cleanup is done, the more important question is why it flooded in the first place — a failed sump pump, an overwhelmed drainage system, a foundation crack, or surface water with nowhere to go. Tracing the actual cause is the only way to prevent the same thing from happening the next time it rains hard, rather than just cleaning up after every storm.

    Common Questions

    What to do if the sump pump fails and the basement floods?

    Turn off electricity to the affected area if it’s safe, move what you can out of standing water, and call a professional to address both the flooding and the cause — a battery backup can prevent this exact scenario in the future. That’s one of the first branches in knowing what to do when your basement floods and the pump has already failed.

    Will a flooded basement dry on its own?

    It can eventually dry on its own, but leaving standing water too long raises the risk of mold and can damage drywall, flooring, and belongings, so it’s worth actively removing water and drying the space rather than waiting it out.

    What soaks up water in a basement?

    For general humidity, a dehumidifier is the right tool; for actual standing water, absorbent materials like towels or a wet vac are only a short-term response — the real fix is finding and stopping where the water is coming from.

    Protecting What Matters Most First

    If you have time before water rises further, prioritize moving irreplaceable items — photos, documents, sentimental belongings — to higher ground first, since those are the hardest to recover once water damage sets in. Electronics and furniture matter too, but they’re generally more replaceable and less urgent than items with no backup. If the flood is already underway and moving fast, focus on your own safety before trying to save belongings.

    After the Immediate Crisis: Drying It Out Properly

    Even after visible water is gone, materials like drywall, carpet padding, and wood framing can hold moisture for days without looking wet on the surface. Running fans and a dehumidifier continuously for several days after a flood, and checking materials by touch rather than just sight, helps ensure the space actually dries rather than just appearing to. Materials that stay damp for more than 48 hours are at meaningfully higher risk for mold, which is part of why thorough drying matters as much as the initial cleanup.

    Working With Your Insurance Company During Cleanup

    If you’re planning to file an insurance claim, it helps to document damage thoroughly before you begin cleanup, including photos and, where practical, a written list of affected items and their approximate value. Keep receipts for any emergency mitigation supplies or services you pay for out of pocket, since many policies that do cover a specific flooding cause will reimburse reasonable mitigation costs. Contact your insurer as early as reasonably possible after the flood rather than waiting until cleanup is fully complete, since some policies have specific requirements about how quickly a claim needs to be reported. None of this guarantees coverage, since coverage depends entirely on your specific policy and the cause of the flooding, but thorough documentation puts you in the best position regardless of how the claim is ultimately decided.

    Preventing a Repeat Before You Fully Reopen the Space

    Before putting flooring, drywall, or stored belongings back into a previously flooded area, it’s worth pausing to address whatever caused the flood in the first place — restoring the space exactly as it was, without fixing the underlying cause, just sets up the same outcome the next time conditions repeat. Drew Dryer can assess the cause quickly enough that this doesn’t have to significantly delay your cleanup and restoration timeline, and knowing the cause also helps you decide what materials make sense for rebuilding — for example, choosing water-resistant flooring options if there’s any remaining risk while a permanent fix is scheduled.

    Get Help With Your Basement

    If your basement is flooding right now, call (260) 305-1147 and we’ll talk you through immediate steps, then get out to assess the cause. Drew Dryer handles both the emergency and the long-term fix honestly. We can walk you through exactly what to do when your basement floods, step by step, over the phone.

    Related service

    More guides

    Get help

    About the author

    Drew Dryer, Owner

    Drew Dryer owns and runs Dryer Basement Waterproofing Fort Wayne. He has 10 years of experience waterproofing basements in the Fort Wayne area, and started the business to work directly with homeowners rather than through a sales layer.

    More about Drew Dryer

    Last updated: September 30, 2026

  • Sump Pump Maintenance Checklist for Fort Wayne Homes

    Sump Pump Maintenance Checklist for Fort Wayne Homes

    Home › Sump Pump Maintenance Checklist for Fort Wayne Homes

    A sump pump needs a few minutes of attention every few months to keep working when you actually need it — checking that it turns on, that the discharge line is clear, and that the pit is free of debris. Most sump pump failures happen because of neglect, not a defective pump, which makes basic maintenance one of the cheapest ways to avoid a flooded basement.

    Test the Pump Itself

    Every few months, pour a few gallons of water into the sump pit and watch to make sure the pump kicks on, moves the water, and shuts off properly once the pit is empty. If it doesn’t activate, the float switch may be stuck, tangled, or worn out. If it activates but struggles, it may be undersized for your basement or nearing the end of its working life. Listen for unusual grinding or rattling noises too, since those often show up before a pump fails outright.

    Check the Discharge Line

    Make sure the discharge line — the pipe carrying water away from the pump — isn’t clogged, disconnected, or frozen where it exits the house, especially heading into winter. A blocked or frozen discharge line means the pump can run but the water has nowhere to go, which can cause the pump to burn out or water to back up. Also confirm the line actually routes water well away from the foundation rather than letting it drain right back toward the house.

    Clear the Pit and Check the Power

    Debris, small stones, or sediment can accumulate in the sump pit and interfere with the float switch or get pulled into the pump itself, so a quick visual check and cleanout every so often helps. It’s also worth confirming the pump is plugged into a working outlet, not sharing a circuit that trips easily, and considering a battery backup if you don’t already have one — a pump with no power during a storm can’t do its job no matter how well maintained it is.

    Know When to Replace, Not Just Maintain

    Most sump pumps have a working life of several years, and age alone is a reason to consider replacement even if a pump is technically still running, especially before it’s tested during a major storm rather than after it’s failed during one. If your pump is aging, undersized, or you’re not confident it would hold up during a serious storm, a proper sump pump inspection or replacement is worth scheduling before you need it.

    Common Questions

    Is it normal for my sump pump to run every 30 seconds during rain?

    A pump cycling that frequently usually means the pit is too small to hold a reasonable volume between cycles or the pump is undersized for the water reaching it — it may keep up for now, but that pace wears a pump out faster than normal cycling. Either way, it’s worth flagging during your next round of sump pump maintenance.

    Why is my sump pump running when it's not raining?

    A pump can run without active rain if there’s a consistently high water table nearby, an underground spring, a plumbing leak feeding the pit, or a float switch that’s stuck in the “on” position — it’s worth checking the float switch first since that’s the most common and simplest cause.

    What is the typical lifespan of a basement sump pump?

    Sump pumps generally last several years under normal use, though heavy-duty cycling from a high water table can shorten that, which is why periodic testing matters even for a pump that seems to be working fine.

    A Simple Seasonal Schedule

    A reasonable rhythm is a full test in early spring before the wettest stretch of the year, a quick check midsummer during peak humidity, and a discharge line check in late fall before the first freeze. This doesn’t need to be complicated — pour water in, watch it cycle, check the discharge line is clear, and glance at the pit for debris. Four brief checks a year catch most of the issues that would otherwise show up as a surprise during the next big storm. Sticking to a seasonal rhythm like this is really what sump pump maintenance comes down to.

    Keeping a Simple Maintenance Log

    Jotting down the date of each check and anything you noticed — a slow cycle, a new noise, standing water in the pit before it activates — makes it much easier to spot a developing problem before it becomes a failure. It also gives Drew Dryer useful information if you do call for service or a replacement, since a documented pattern of decline is more useful than “it just stopped working.”

    What a Professional Sump Pump Inspection Adds Beyond DIY Checks

    The checklist above covers what a homeowner can reasonably check without special equipment, but a professional inspection goes further — testing the pump under a higher simulated load than a homeowner would typically create with a bucket of water, checking the electrical connection and outlet for wear, confirming the discharge line has proper slope and no hidden blockages along its full length, and evaluating whether the pit itself is appropriately sized for your basement’s actual water volume. Drew Dryer can also tell you honestly whether your current pump is nearing the end of its useful life based on wear patterns that aren’t always obvious from a simple on/off test, which is useful information before a pump fails unexpectedly rather than after.

    Get Help With Your Basement

    If your sump pump failed a test or you’re not sure how old it is, Drew Dryer can take a look and tell you honestly whether it needs service or replacement. Call (260) 305-1147 or reach out here. He can also help you build a sump pump maintenance routine you can actually stick to.

    Related service

    More guides

    About the author

    Drew Dryer, Owner

    Drew Dryer owns and runs Dryer Basement Waterproofing Fort Wayne. He has 10 years of experience waterproofing basements in the Fort Wayne area, and started the business to work directly with homeowners rather than through a sales layer.

    More about Drew Dryer

    Last updated: September 30, 2026

  • Interior vs Exterior Basement Waterproofing

    Interior vs Exterior Basement Waterproofing

    Home › Interior vs Exterior Basement Waterproofing

    Interior vs. exterior basement waterproofing comes down to where the work happens: interior waterproofing manages water from inside the basement with drain tile and a sump pump, while exterior waterproofing seals the foundation wall from outside before water reaches it. Interior work fits most Fort Wayne basements dealing with water through the floor or cove joint; exterior work is the right call when the wall itself is cracking, bowing, or has failed despite interior fixes.

    How Interior Waterproofing Works

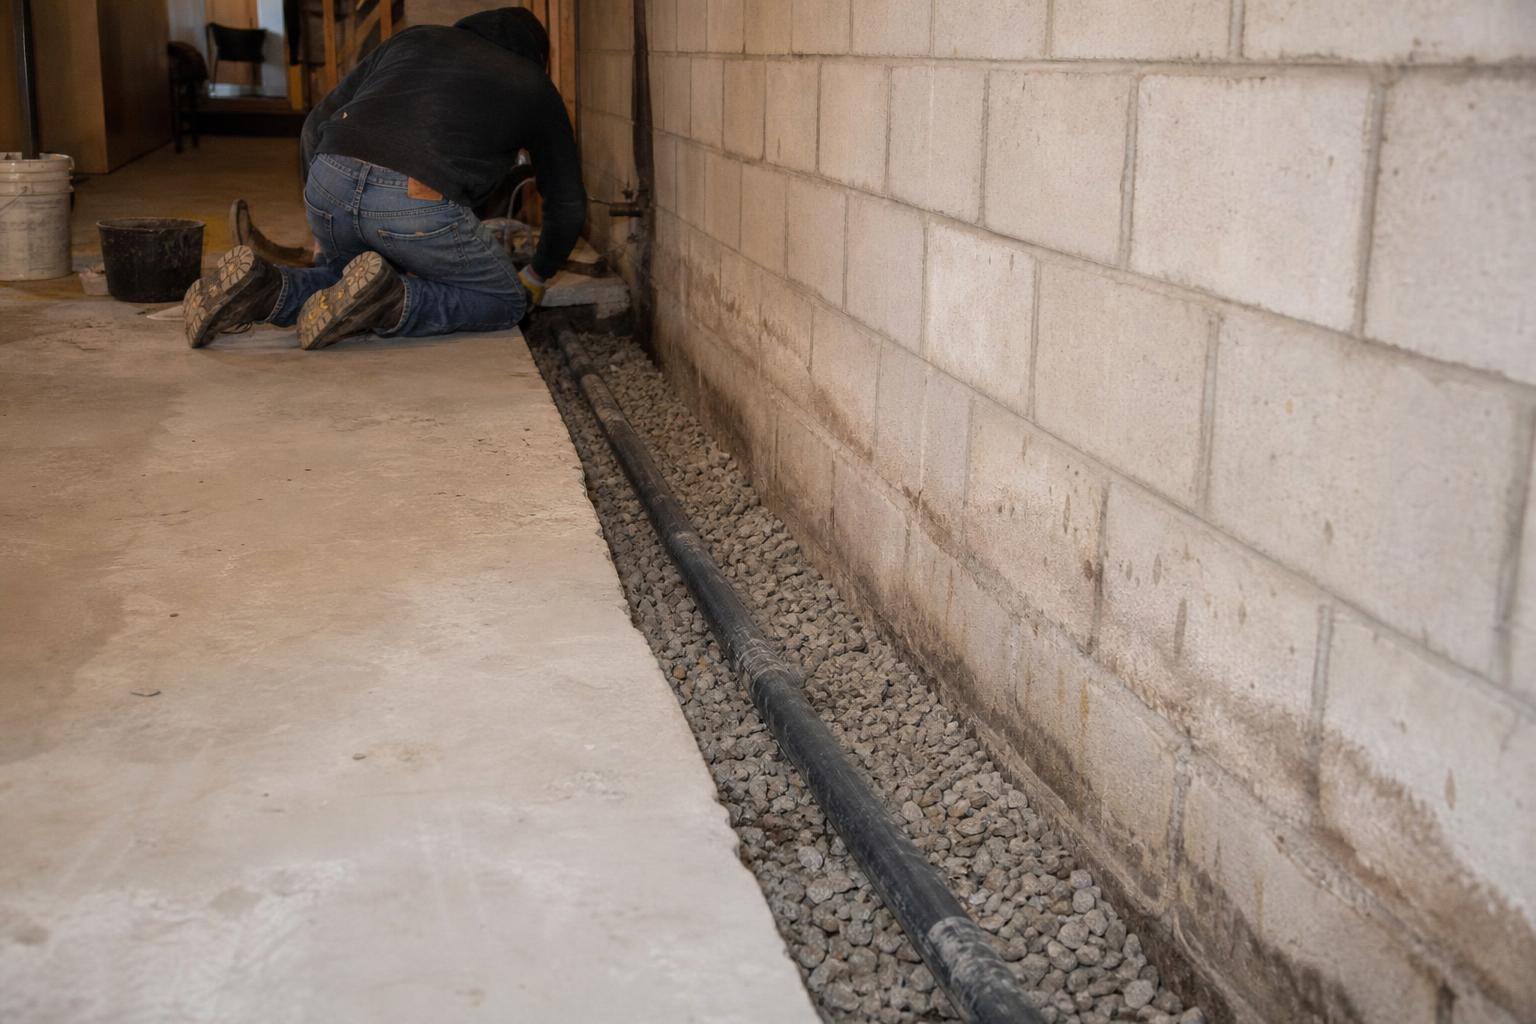
    Interior waterproofing typically involves cutting a channel along the basement floor’s perimeter, installing drain tile below floor level to intercept water, and routing it to a sump pump that discharges it away from the house. Because it doesn’t require excavating around the home, it’s usually less expensive and less disruptive than exterior work, and it can be done in any weather since it doesn’t depend on ground conditions outside.

    How Exterior Waterproofing Works

    Exterior waterproofing means excavating along the foundation, repairing any cracks, and applying a waterproof membrane directly to the wall along with drainage at the footer. It stops water before it ever reaches the block or concrete, which makes it the more thorough fix for a wall that’s actively failing, but it costs more because of the excavation and disturbs landscaping, walkways, or patios near the foundation.

    Interior vs. Exterior Basement Waterproofing: The Real Difference

    Interior systems manage water after it’s already at the wall or floor; exterior systems stop it before it gets there. For most Fort Wayne basements — where the issue is water coming up through the floor joint or seeping through a stable wall under normal clay-soil pressure — interior work handles it well. Exterior work becomes the better answer specifically when the wall itself shows structural signs like bowing, significant cracking, or when other exterior work is already planned and the ground will be disturbed anyway.

    Cost and Timeline Differences

    Interior work is generally faster to schedule and complete since it doesn’t depend on digging conditions, and it’s typically less expensive for a comparable scope of coverage. Exterior work takes longer because of excavation and restoration afterward, and pricing is higher due to the labor and equipment involved. Neither is inherently “better” — they solve different problems, which is why an honest assessment matters more than picking one option in advance. Cost is usually the first thing homeowners ask about when comparing interior vs exterior basement waterproofing, but timeline and disruption matter just as much.

    Common Questions

    Should I waterproof my basement from the inside or outside?

    Interior waterproofing is the right call for most Fort Wayne basements because it manages water already coming through the floor or cove joint without the cost of excavating outside, while exterior work makes more sense when the wall itself is cracking or bowing. That question is really at the heart of interior vs exterior basement waterproofing decisions for most Fort Wayne homes.

    Can I waterproof my basement walls from the inside?

    Yes — interior drain tile manages water along the base of the wall and floor from inside the basement, and for light dampness a masonry sealer can help, though neither replaces exterior work for a wall under real structural stress.

    A Third Option: Fixing It From Outside Without Full Excavation

    There’s occasionally a middle ground — addressing a specific, localized section of exterior wall rather than the full perimeter, especially if the problem is concentrated in one area, like near a downspout or a low grading spot. This costs less than a full exterior system but more than interior work, and it only makes sense when the cause is clearly tied to that one section rather than general pressure around the whole foundation. It’s not the right fit for most basements, but it’s worth mentioning during an assessment if your situation fits.

    How Long Each Option Typically Lasts

    A properly installed interior drain tile system, maintained with basic sump pump upkeep, can last for decades, since the components — pipe, gravel, and a serviceable pump — don’t degrade quickly when installed correctly. Exterior membrane systems are also built for the long term, generally matching or exceeding the lifespan of interior systems, since they’re addressing the wall directly rather than managing water after the fact. Neither option is a short-term fix when installed properly, which is part of why the upfront choice matters.

    Considering the Age and Condition of Your Foundation

    The age and material of your specific foundation plays into this decision more than people expect. A poured concrete foundation, generally more common in newer Fort Wayne construction, tends to be less porous than block, which sometimes means water intrusion is more localized to specific cracks rather than distributed across the wall — a pattern that often favors targeted interior work or crack repair over a full exterior system. An older block foundation, especially one that’s shown multiple signs of water over many years across more than one wall, is more likely to benefit from a comprehensive approach, whether that’s a full interior drain tile system around the whole perimeter or, if the walls themselves show real wear, exterior work on the most affected sections. This is exactly the kind of judgment call that benefits from an in-person look rather than a general rule applied to every basement the same way.

    Get Help With Your Basement

    Drew Dryer will look at your basement and tell you plainly which approach actually fits. See our full waterproofing services or call (260) 305-1147 to get started. That’s the real answer on interior vs exterior basement waterproofing for your specific walls.

    Related Reading

    More guides

    Get help

    About the author

    Drew Dryer, Owner

    Drew Dryer owns and runs Dryer Basement Waterproofing Fort Wayne. He has 10 years of experience waterproofing basements in the Fort Wayne area, and started the business to work directly with homeowners rather than through a sales layer.

    More about Drew Dryer

    Last updated: September 30, 2026

  • Basement Sealing vs Waterproofing

    Basement Sealing vs Waterproofing

    Home › Basement Sealing vs Waterproofing

    Basement sealing vs. waterproofing — the two terms get used interchangeably, but they’re related, not identical: sealing applies a coating or membrane to block light moisture from the surface, while waterproofing actively manages water — through drain tile, sump pumps, or exterior membranes — to handle real hydrostatic pressure. Sealing alone works for minor dampness; it isn’t enough for a basement under sustained water pressure.

    What Sealing Actually Does

    A masonry sealer or waterproof paint applied to the interior of a foundation wall can reduce light moisture transfer and help with minor dampness or efflorescence, the white mineral residue water leaves behind as it evaporates from block or brick. It works by creating a barrier on the surface of the wall. The limitation is that it doesn’t manage water — it just tries to block it, and if there’s enough pressure behind the wall, water will often find a way around the sealed area or push through elsewhere, sometimes trapping moisture inside the block in the process.

    What Waterproofing Actually Does

    Basement waterproofing takes an active approach: interior drain tile collects water at the footer and routes it to a sump pump before it can pressure the wall, while exterior waterproofing seals and drains the wall from outside before water reaches it at all. Both approaches manage the water itself rather than just trying to block it from the surface, which is why they hold up against real hydrostatic pressure — the sustained force Fort Wayne’s clay soil puts on a foundation — in a way a sealer alone can’t.

    Basement Sealing vs. Waterproofing: Which One You Actually Need

    The honest way to tell the difference is by how the water is showing up. Occasional light dampness, minor efflorescence with no active water, or a basement that just feels a little musty in humid months might genuinely be a candidate for sealing plus better humidity control. Standing water, water actively tracking in along a crack or the cove joint, or a sump pump running constantly point toward needing a real waterproofing system instead, since a sealer won’t stop that volume of water. Working through basement sealing vs waterproofing this way keeps the decision simple instead of overwhelming.

    Don't Buy More Than You Need — Or Less

    The risk with sealing is spending money on a coating that doesn’t actually solve a real water problem, and the risk with jumping straight to a full waterproofing system is spending more than a smaller basement genuinely needs. The only way to know which side of that line your basement is on is a real walk-through, not a guess based on how the basement looks on a dry day.

    Common Questions

    Is it worth it to waterproof a basement?

    For a basement with recurring water — not a one-time event — waterproofing is usually worth it, since the cost of a proper fix is typically less than repeated water damage, mold remediation, or continued pressure on an aging foundation wall. If you’re still weighing basement sealing vs waterproofing for your own basement, that’s exactly the kind of question worth asking in person.

    A Simple Way to Test Which Camp You're In

    One rough test: if a section of wall feels damp to the touch but there’s no visible water and no efflorescence building up, sealing plus better humidity control may genuinely be enough. If you can see water, track a wet line along the floor after rain, or notice efflorescence rebuilding within weeks of cleaning it off, that’s a sign of active water movement that a surface sealer won’t keep up with long term. This isn’t a perfect diagnostic, but it’s a reasonable first read before scheduling an assessment.

    What Happens If You Guess Wrong

    Sealing a wall that actually needs waterproofing doesn’t just waste the cost of the sealer — it can delay a real fix while water keeps working on the wall from behind, and in some cases trap moisture that makes conditions worse. On the other side, jumping straight to a full waterproofing system for a basement that only needed better grading means spending more than necessary. Getting an honest, in-person read before choosing either path is worth the extra step.

    Combining Both Approaches When It Makes Sense

    Sealing and waterproofing aren’t always an either-or choice — some basements genuinely benefit from both, used for different purposes. A basement that’s had interior drain tile installed to manage active water pressure can still benefit from a masonry sealer on areas prone to light surface dampness or minor efflorescence that isn’t part of the main water problem drain tile is addressing. Used this way, sealing becomes a finishing touch on top of a real waterproofing system rather than a substitute for one. The mistake to avoid is using sealing as the primary or only response to a basement that’s actually dealing with hydrostatic pressure, standing water, or a crack that’s letting water through — in that situation, sealing alone will disappoint, sometimes after the cost and effort of applying it in the first place.

    Get Help With Your Basement

    Not sure which category your basement falls into? Drew Dryer will look at it in person and tell you honestly whether sealing is enough or whether you need real waterproofing. Get in touch or call (260) 305-1147. Either way, he’ll give you a straight answer on basement sealing vs waterproofing for your specific walls.

    Related Reading

    More guides

    About the author

    Drew Dryer, Owner

    Drew Dryer owns and runs Dryer Basement Waterproofing Fort Wayne. He has 10 years of experience waterproofing basements in the Fort Wayne area, and started the business to work directly with homeowners rather than through a sales layer.

    More about Drew Dryer

    Last updated: September 30, 2026